Thursday, January 30, 2014

We Three Tags...eP post


For my eclectic Paperie post this week, I decided to have a play with two things I've been ignoring lately: #8 manila tags and Dylusions spray inks. I don't know if you do this but it seems that I keep reaching for the same media or surfaces and it does me a world of good to shake things up every once in a while.


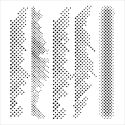
I grabbed my handy dandy craft mat and some ink sprays: Bubblegum Pink, Squeezed Orange, and Lemon Zest, along with a mini mister of water. After I randomly sprayed the mat with these inks and water, I dragged, plopped, and wiggled the tags through the inky mess. I was experimenting to see how moving or not moving the tags would affect the ink patterns. Then I dried each and did it again to build up another layer or two. Once they were dry, I spritzed more water through TH Measured layered stencil on the dreams tag and through the TH Burlap layered stencil on the house tag. Both were allowed to sit for a few minutes and then the water, and some of the ink, was removed by rolling paper towel over them. For good measure, and a bit more texture, water was flicked over all three to create lovely spots.


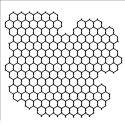
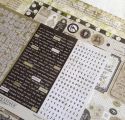
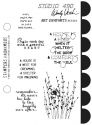
White embossing paste was scraped through TCW's Mini Tile Texture stencil on each tag and then allowed to air dry. The lovely grassy stamp with the flowers from Wendy Vecchi's Art Comforts stamp was stamped on the bottom edge of all three tags using Jet Black Archival ink. The three sentiments come from the same stamp set...love it!


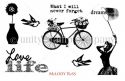
The bird and woman with the net come from Unity's Love Life stamp set by Melody Ross.


The house was created from scraps sitting on my desk. The little door is kraft and the hearts are from an MS punch. All edges were inked with Vintage Photo or Black Soot Distress inks.


The harlequin and scallop borders were cut from black cardstock using MFT dies and the clouds were cut from old book paper, also with an MFT die. White gesso was smeared onto them to partially obscure the text and they were edged along the bottom with Vintage Photo before being adhered and doodled on and around. White gesso was pounced through a piece of punchinella on the house tag in order to embed the house and border into the background. White gel pen was used to doodle on all three tags. The final touches were to edge each tag with Black Big Brush pen before mounting on black cardstock, leaving a narrow mat for contrast and then adding toppers of ribbon, cord, or seam binding as toppers. Little black speckles were added with Jet Black Archival and a TH stamp.


Thanks for joining me today. I hope the brightness of the tags has not damaged your eyes in any way...perhaps you should take the rest of the day...and maybe tomorrow off...JK...lol. I do like the pops of Dylusions sprays next to black and white...they shout "notice me". I appreciate your visit and read and re-read your lovely comments. You brighten my day...hope these tags did the same for you :)

I am entering these tags in the following challenges:
Through the Craft Room Door ~ Anything Goes
Love to Scrap ~ #22 Tags
613 Avenue Create ~ #56 Anything Goes
Challenges 4 Everybody ~ #37 Anything Goes
Great Impressions ~ January challenge Use something new (Art Comforts stamp set)

Life is good; so is art.
Bonnie

If you click on the thumbnails below, you will be magically transported to the eclectic Paperie store:

Tuesday, January 28, 2014

Again with the altered playing cards!


Here are another threesome of those altered playing cards I've been creating. I usually do a whole batch of them at once so I always have something ready to play with at any given moment. I do all of the prep work at once, and then all of the backgrounds in another sitting and so on. They are wonderful little surfaces for experimenting with colour combos or techniques. The first one makes me laugh both because of the fabulous Hatter image from Hidden Vintage Studios Down the Rabbit Hole but also because of the saying. The mesh is drywall tape, the stamping is a music score stamp. The stencilling is gesso pounced through TCW's Halftone borders, and the brown border is cut with an MFT die.


The second image is also from Hidden Vintage Studios, this time Just So Bossy, and is one of my favourite images. I love his facial expression...it just seems to say "What were you thinking?" as if we should know better than to leave him unsupervised. The stencilling on this one is gesso through TCW's Mini Punchinella stencil which is probably the one I use more than any other. The stamping is from a crackle stamp. The wording is popped up on foam tape for dimension.


The third playing card has a Tumble Fish Studios image. She looks so serious and yet matter of fact and seems to suit the wording so well. Between the dotty scraps is a scrap of burlap...love the texture that adds. The stencilling is gesso through TCW's Mini Tile Texture. Can you tell I love my stencils? I also love the red and purple on the background with the dramatic black contrast.

Anyway, that's the next three in the line-up. Again, these cards evolved out of a wonderful workshop, The Spoken Soul, by Mary Jane Chadbourne through Artful Gathering 2013. The DVD for this class is available for pre-order at this link. Mary Jane is teaching at Artful Gathering 2014...I can't wait to sign up for whatever she is offering. Thanks for taking the time to join me today. I am very grateful for your company.

Life is good; so is art.
Bonnie

Monday, January 27, 2014

Sew... CYP Challenge 198


It's Monday so that means a brand new challenge at Craft Your Passion Challenges and the theme this week is Spots and Stripes. We want to see both on your project...easy peasy, right? I am a fan of both spots and stripes plus our fabulous sponsor is Bugaboo Stamps, one of my faves, so I was a happy crafter. I chose to work with a Stella image because her crustiness and large attitude make me laugh.


This one is called Stella Sewing - Thread. She's quite the pin-up gal! I coloured her with Prismacolor pencils and then fussy cut her with a narrow white border to allow the image and its details to really stand out against the black. It also makes the tiny bits that stick out less likely to tear off..


The background striped and spotted papers are from a very old paper pack from American Crafts. I really am making an effort to use up some of the mounds of 12 x 12 DP I have. I used to not want to cut into a whole sheet just for some small pieces but then it just sat there unused. I sandwiched the strips of dotty paper between black cardstock to form stripes and faux stitched the edges to further the sewing theme. The two borders were cut with an MFT die. The black strip with the pearls is actually two lengths of ribbon wrapped to the back of the background layer. The sentiment was computer generated and printed on a punched circle of pink cardstock before being matted in black and faux stitched. It is popped up on foam dots for dimension.

Well, that's it for Stella and me. We thank you for your visit and hope you enjoyed Stella's new outfit...better her than me..lol. If you get a chance, pop over to the Craft Your Passion Challenges blog to see the fun projects by the rest of our talented DT. Then get your spots and stripes on...and join the fun.

I am entering this card in the following challenges:
613 Avenue Create ~  #56 Anything Goes
Di's Digi Designs ~ Spots and Dots
My Sheri Crafts ~ #125 Delightful Digis
Catch the Bug ~ January Photo Inspiration Challenge (black and white)
Delicious Doodles ~  #72 Must use a ribbon
Daring Cardmakers ~ Earn your stripes
Frosted Designs Frosted Friday Challenge ~ Polka Dots

Life is good; so is art.
Bonnie

Friday, January 24, 2014

A Winter's Day ~ Craftitude Challenge 57


Well, that fortnight certainly flew by quickly! It's time for the new challenge at Craftitude where the themes this time are Anything Goes (always) or I See Fluffy. The fluffy can be something in your image like snow, an animal. clouds etc. or an embellishment like fuzzy ribbon or Flower Soft, for example. Our wonderful sponsor this time is Delicious Doodles where we found some amazing images, as usual. I chose this beautiful scene called A Robin's Christmas which I coloured with my Prismacolor pencils. I chose to play down the Christmas elements a little since it is long over but loved the details in this image. The tree was given white half pearl decorations...maybe they are perfect little snowballs made by winter fairies :) The sky was coloured with Broken China Distress ink applied with a blending tool.

I purposely sized the digi smaller so that I could mat it with black to provide a contrasting frame and yet still be 2.5 x 3.5"...a true atc. I added a metal snowflake with a silver brad to the top right corner to balance out the shine from the pearls and the heaviness in the bottom left corner.

Thanks for popping by today. We have had super cold weather lately bu gorgeous sunshine...there's nothing prettier than a snowy sunshiny winter day, especially if you are warm and crafting inside...lol. Hope you are, too! Be sure to pop by the Craftitude blog to check out the lovely responses to the AG/I See Fluffy Challenge by own wonderful DT. We'd love to have you join us.

I am entering this ATC in the following challenges:
Digi Haven ~ Snow Buddies
Emerald Faeries Challenges ~ #51 Things With Wings
Emergency Crafters ~ January Cold (blue or snowflake)
Divas by Design ~ Anything Goes
The Sisterhood of Crafters ~ Winter Snowflakes

Life is good; so is art.
Bonnie

Thursday, January 23, 2014

Altered Board Book ~ Round Two


Hi all. I'm back with the second double page spread of my altered child's board book exploring the theme of bees. I found these two fabulous quotations about books and bees so they became the inspiration for these pages. Since the book had already been gessoed (glad I did it all at once), I started to add colour to the background by applying Wild Honey, Scattered Straw, Spiced Marmalade, and Mustard Seed Distress ink to the pages with my foam applicator tools. Once that was dry, I applied Nutmeg Silks Acrylic Glaze through the Prima Threads stencil with a piece of Cut n Dry Foam..


Torn pieces of vintage book paper With inked edges were adhered to the background with Matte Medium with an additional layer over the top to protect it from the wet mediums still to come. Those old pages can become quite fragile. Butterscotch,  Chocolate, and Mango gelato were used to edge both pages and to add more colour here and there. The gelato was spread and blended with a dry finger.


Black Wendy Vecchi Embossing Paste was scraped through the TCW Mini Chicken Wire Reversed stencil and left to dry. White gesso was pounced through the TCW Halftone Borders stencil as well as though the TCW Well Rounded stencil to achieve the open rings. The library cards are a free download from Linda Tieu and were edged in Vintage Photo and stamped with a harlequin rubber stamp using Old Paper Distress ink. They were also grunged up with Vintage Photo to take away the clean unused look and one was torn to create an interesting bottom edge.


The little bee boy is an image from Hidden Vintage Studio called Busy Bees and the stack of  books comes from Anamnesis on Etsy. The vintage bee image comes from The Graphics Fairy, I think, and was matted on black cardstock to give it greater visual weight and contrast with the background. It was popped up on foam tape for added dimension.


The bee definition comes from an old and well-loved child's dictionary purchased at the thrift store. It was also matted in black and popped up on foam tape.


The hexagons were cut with Spellbinder's dies from Authentique's Peaceful Collection paper. The little bee circles were punched from Graphic 45's Olde Curiosity Shoppe paper and deepened around the edges, like the boy and books, with Black Big Brush pen. All of these elements were coloured around with Inktense pencils activated with a waterbrush. The black borders on both pages are actually off-cuts from and MFT die and dotted with a white pen. The measuring tape is pieces of washi tape which I glue to the pages so they won't lift later.

The finishing touches began with Black Big brush pen around the outside edges, doodling and outlining with a black Sharpie, and my favourite splatter dots from a TH stamp and Ranger Coffee Archival ink. White gesso was smeared randomly with my finger, both to knock back some of the darker areas and also to help embed elements into the background. I like the scuffed look where the gesso catches on the raised embossing and the edges of layers.

That's it for my second set of pages dedicated to The Secret Life of Bees. Thank you so much for visiting today. I read and re-read your comments and appreciate the time you take to visit. I hope you get a chance to play and get your fingers messy soon.

Life is good; so is art.
Bonnie

Here are the magic links that will take you to the eclectic Paperie store to find these products: