Thursday, May 28, 2015

RSD Coffee Monsters Altered Book ~ Part 2


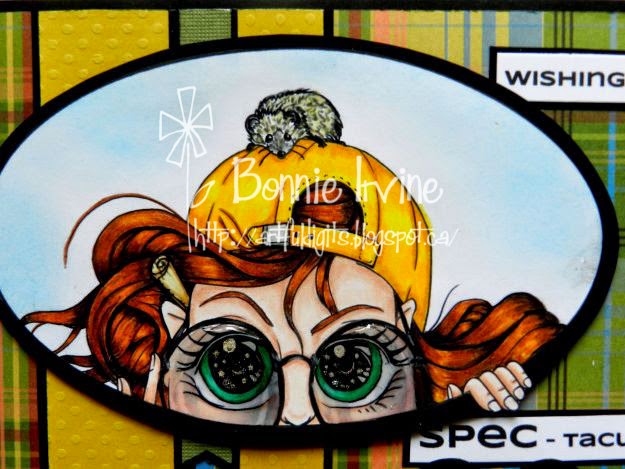
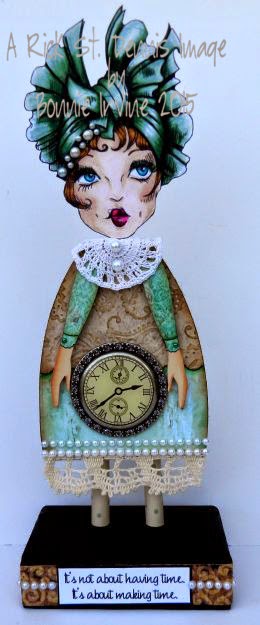
Hi everyone. I'm back with the next two pages in my mixed media altered board book featuring the cute monsters from Rick St. Dennis and explaining the importance of coffee. If you missed the first spread, you can find the post here. Like all of my altered books, I keep some things constant throughout for continuity but change it up a little each spread to keep it interesting. In this book, I have featured mainly browns, blacks, and natural colours on the backgrounds (a departure for me) with pops of brights. Each two page spread features a monster, a mug of coffee using Rick's Pencil cup image as the template, a coffee title, and a saying.


For the second spread, the adorable Fwayt, who was coloured bright red using a mix of Prismacolor and Polychromos pencils, is the star., He and his balloons were fussy cut leaving a narrow white border, matted in black cardstock, and trimmed again. The coffee mug was traced onto French book paper, inked with Barn Door Distress ink, and shaded with Inktense pencil activated with water.


The gessoed background was covered with Postale Tissue Wrap adhered with Matte Medium. A thin layer of gesso was added over that to knock back the text. Once dry, Vintage Photo, Black Soot, and Walnut Stain Distress inks were applied using several coats. This gave a very grungy, aged appearance in the tones I had chosen to repeat on each page. A Stamper's Anonymous Coffee stain stamp was applied in a few places using Coffee Archival ink. At this point, I sprayed a fixative over the background to set the Distress inks. Pieces of burlap and handmade paper that looks like it has embossed shiny coffee beans on it were layered behind the images. Harlequin and star rub-ons were applied and die cut harlequin border was added in 5 (odd number) places. The title was created from TH  AlphaTiles and dotty circles plus a doodled border finished off the spread.


The next two pages featured the sweet little monster, Threek, who has Get Well wishes for people like me who have no pulse until some coffee is poured into me. Threek was coloured with Prismacolor and Polychromos pencils and Glossy Accents was added to those big sad eyes to create a lovely shine and a little dimension. He was fussy cut and matted the same as Fwayt. The coffee mug was prepped in the same way as above, only this time using Picked Raspberry Distress ink for the background colour.


The background for this spread began as an experiment which turned out kind of cool. The gessoed pages were basecoated with Titan Buff acrylic paint and while still wet, narrow washi tape was crisscrossed in a grid pattern over top. The wet paint dried adhering the washi at the same time. Once that was dry, Walnut Brown Big Brush pen was run along the top and left side of each square and smudged with my finger. The bottom and right side of each box was lined with black pen. Stamping of a zigzag pattern and dots was added with Tree Branch Archival ink and black doodling was used to create a zigzag border.


The zigzags were repeated from the large flatline heartbeat which was drawn across the page with a black Pitt pen. Above the flat part, the letters for beeeep were stamped with Jet Black Archival ink Scraps of designer paper, corrugated cardboard, and drywall mesh were layered behind elements. The extra green tag was added behind the mug to pull Threep's lovely green colour onto the other page. The heart is a nod to the heart beat pattern. Pink and black dotty circles and Black Big brush pen edging completed the pages.

Thanks so much for joining Fwayt, Threep, and me today.We appreciate that. Stay tuned until next week when I will introduce you to more Coffee Monsters. As for me, I'm going to load on some more caffeine..LOL.

Life is good; so is art.
Bonnie

Tuesday, May 26, 2015

New Release Tuesday at The East Wind


Hi everyone, Tuesdays and Fridays are New Release Days at The East Wind shop. Today's new image is called Lucy Loo Long Pipe and she is created in the Hanbok style that Unky has been exploring for the month of May. Love it!


I coloured Lucy Loo with a mix of Prismacolor and Polychromos pencils, adding a little clear Wink of Stella to her pipe smoke. Lucy was then fussy cut leaving a narrow white border. She was then matted with black cardstock and trimmed out again. Foam squares were added to the back for dimension.

The background began as a rectangle of white mixed media paper, on which I spritzed Lindy's Stamp Gang Yellow Rose of Texas and Tibetan Poppy Teal, allowing drips to go their own way. Cheesecloth was added with gel medium to form the cloud Lucy Loo and her little gray friend are floating on. jet Black Archival ink was used to stamp a Joggles Starburst Background Noise stamp in a few places, including over the cheesecloth. An earth image was printed from the Internet, fussy cut and edged with black Big Brush pen. It was then popped up on foam tape and adhered onto the background over my new Scribbles die from Alterations.


The sentiment was computer generated, printed on white cardstock and trimmed close to the words. The segments were matted with black and then popped up on foam tape to adhere it to the page. Three shimmery brads were added to the bottom left corner both to pull out the background colours and add balance to the composition. To complete the page, the outside was edged with black Big Brush pen and then the page was matted in black cardstock to frame it and add strength.

Thanks for joining Lucy Loo, her little buddy, and me today. We appreciate that you took the time to stop by. To see other wonderful creations with this fabulous new release, check out The  East Wind Facebook group where other talented DT members will be posting their makes. We would love to see what you do with her, too.

Life is good; so is art.
Bonnie

Friday, May 22, 2015

Steampunk Sweetie ~ Sweet Pea Stamps Progressive Challenge


Hi everyone. Part 2 of the Progressive Challenge on Sweet Pea Stamps Facebook group started last Monday with this fabulous image from Sandra Caldwell. I absolutely love her quirky whimsical images and I love Steampunk so this project was a delight to create.


I coloured the image called Steampunk Old Lady can be found at Sweet Pea Stamps if you haven't been playing along. If you have you will have received this image free just for entering last time. I coloured Old Lady with Prismacolor and Polychromos pencils adding a resin monocle over the one in the image. I filled this with Glossy Accents to create the lens. She was then fussy cut leaving a narrow white border and then matted in black before being trimmed again. She was then popped up on foam tape.


The background began as a black piece of cardstock cut to a #10 size. A mossy green textured cardstock was cut to fit inside that black tag. A rectangle was cut from dotty embossed gold cardstock and then matted in black. Two lengths of black trim with silver metal 'rivets' were cut and adhered to the top and bottom of the gold rectangle. Another two lengths were stapled to the top of the tag with a TH tiny attacher. Metal gears, clock faces, and hardware were adhered with Glossy Accents above and below Old Lady to frame her and draw the eye through the image and tag. Black glittery letter stickers were added to spell Steampunk and scattered dots were stamped using Jet Black Archival to finish off the tag.


Thanks so much for joining Old Lady and me today. We appreciate your fine company. To check out other creations using this fabulous image from Sandra Caldwell, pop over to the Sweet Pea Stamps Facebook Fans & Friends page. We would love to see where Old Lady leads you. I love her to bits!

Life is good; so is art.
Bonnie

Thursday, May 21, 2015

For the Guys ~ The East Wind FB contest


Hi everyone. Today marks the beginning of the new contest at The East Wind Facebook group. Everyone totally rocked our last contest! Our theme this time is For the Guys, which I found a challenge. I rarely make anything suitable for men so it really made me think...hard.


I decided to use this cute Aurora image called Aurora Explore because I just love it. I coloured Aurora with Prismacolor and Polychromos pencils. The glasses were filled with Glossy Accents after highlighting the lights in her eyes with metallic pen. The sky was inked in with Tumbled Glass Distress ink. The oval was then fussy cut and the image was matted with black cardstock before being popped up on foam tape.


I kept the background quite tailored because I wanted the card to be more masculine. Plaid designer paper matted with black was adhered to a white card base. Yellow dotty cardstock and green textured cardstock were die cut into fishtail flags and matted with black.


The sentiment was computer generated and printed on white cardstock. It was divided into chunks and each one was matted with black cardstock. To complete the card, a pair of resin spectacles (glasses) were adhered overlapping the sentiment and then filled with Glossy Accents to create the lenses.

Thanks so much for stopping by today. You have made Aurora and me very happy. To see other DT projects and read about the contest, please pop over to The East Wind Facebook page when you get a chance. We had so many fabulous entries for our last FB contest and I'm hoping for the same this time. I love all of the inspiration!

Life is good; so is art.
Bonnie

Monday, May 18, 2015

Your wings are ready ~ One Sweet Challenge mid-month reminder


Hi everyone. it's time for our mid-challenge reminder post at One Sweet Challenge. May's theme is Things With Wings and the hardest part of that challenge was narrowing down to two all of  the choices of fabulous images at Sweet Pea Stamps.I am on a mission to choose an image from each artist for these monthly challenges, both to stretch myself and to really sample all of the inspiration at the shop.


For this mixed media piece, I chose to feature Janna  Prosvirina's image called Fireflies. Isn't she a beauty? I decided to  make mine butterflies to better suit where I wanted to go with this theme. I coloured her with a mix of Prismacolor and Polychromos pencils and fussy cut her leaving a narrow white border. She was then adhered to black cardstock and a narrow black border was cut. This gives strength to the skinny bits when they are popped up on foam and provides strong contrast with the background.


The background began as a 6 x 8" piece of mixed media paper which I spritzed with Tattered Angels Rum Punch spray and Autumn Maple Crimson Starburst spray from Lindy's Stamp Gang. Both have lovely bits of shimmer in them which catch the light in a delicious way. Over that, I stamped Joggle's Starburst Background Noise stamp using jet Black Archival, Red Geranium Archival, and Rocket Red Gold Brilliance Archival inks.jet Black Archival was also sponged through TCW's Halftone Borders stencil to add more texture and pattern.


The sentiment was printed on white cardstock and matted with black before being adhered above the sweet image. Two white feathers were crossed at the ends and adhered to frame her. Where they crossed was topped with a layered butterfly from Pink Paislee and another was added on the vertical feather. To help balance the composition, three black faceted buttons from my grandmother's stash were adhered to the bottom left corner. Black cardstock was added to the background to frame the entire page and add the contrast I like so much.

Thanks so much for stopping by today. When you get a chance, pop over to the One Sweet Challenge blog to see the creations by my talented teamies. We would love to see what you create for our May challenge theme Things With Wings. I hope you will join us.

Life is good; so is art.
Bonnie

Saturday, May 16, 2015

RSD Coffee Monsters Altered Board Book


Hi all. I have started yet another altered children's board book using images from Rick St. Dennis. This one will follow a coffee theme and will feature several of Rick's cute monsters because I am a monster without my morning coffee...and I am not alone! Besides, I love these guys. They are so fun!


The star of the first two page spread is the cute monster called Swixtus. He was coloured with Prismacolor and Polychromos pencils. He was fussy cut leaving a narrow white border and then matted with black cardstock. Swixtus was then popped up on foam dots for dimensionand Glossy Accents were added to his eyes. (Monsters like that.)


I began by sanding each page as well as the covers and then putting gesso on each spread. That is the tedious part because there is drying time and sometimes multiple coats depending upon how saturated the original colour was. Washi tape was adhered to the center line between the pages and then covered with gesso. For the first spread, brown Neocolor II watercolour crayons were  scribbled over the gesso and activated with water. This didn't give me the depth of colour that I was looking for so I topped that with Vintage Photo Distress stain. Yep, that did it! Jet Black and Coffee Archival inks were sponged through Sheena Douglass' Distress Grid stencil. White gesso was pounced through TCW's Tiny Circles stencil to apply more random pattern.


Coffee themed digital paper was cut into a rectangle and edged with Vintage Photo, then edged with black Big Brush pen. This and a scrap of a corrugated coffee sleeve were layered behind Swixtus and lined with black Big Brush pen. A small fussy cut clock ('cause it's always coffee time) was added to that vignette. To create a nod to  the sentiment, travel themed washi tape was adhered to white cardstock and added to the background. The sentiment was printed on white cardstock, edged with black. It was then attached to a coffee cup cut from French book text coloured using gelatos and Inktense pencil. The coffee cup started as Rick's Pencil Cup image which was used as a template. Another piece of the coffee sleeve was added under the cup and a coffee bean image was fussy cut and layered over both. The page was finished by die cutting a scalloped border from black and red cardstock. This border was split into two sections and adhered to each page. Black letter stickers were added to each section. A little outlining and edging of the pages with Black Big Brush pen completed the spread.

Thanks so much for joining Swixtus and me today. We're happy that you did that...and that you waited until we had our first fill up of coffee. We're so much more sensible after that. Stay tuned for more of Swixtus' friends when I post next week.

Life is good; so is art.
Bonnie


Tuesday, May 12, 2015

New Release at The East Wind ~ Lucy Loo Hair on Top


Hi everyone. There is a new release at The East Wind today and I chose this image to be the star of a card for my mom for Mother's Day. My mom absolutely loves the colour turquoise plus all things with an Asian feel so I decided to combine the two.


The image is called Lucy Loo Hair on Top.  I coloured Lucy Loo and her fabulous hair with Prismacolor and Polychromos pencils and then fussy cut her leaving a narrow white border. She was then matted with a layer of black cardstock and popped up on foam tape to add dimension.


The background began with a white card base to which I added a black rectangle. A rectangle of patterned and textured designer paper from DCWV's The Far East Stack was layered over the black.  Next I added the second half of the background I created for another project which you can find here. The background began as a piece of mixed media paper which I spritzed with Tibetan Poppy Teal and Witch's Potion Purple Lindy's Starburst sprays. Extra drops of the Tibetan Poppy were added and then I used the TH spritzer tool to blow out those tiny runs. It's so much easier than using a straw! Black Big Brush pen was added to the edges.


Lucy Loo was adhered over two tiny Martha Stewart doilies both to create a more delicate feel and to allow Lucy Loo to show up better. The letters for Mom are glittery stickers which were placed onto black cardstock and trimmed to fit the corner. The only other embellishment is a metal butterfly (Mom loves butterflies as much as I do) which I adhered to the top left corner of the mixed media background.

Thanks for joining Lucy Loo and me today. We always appreciate your fine company. By the time you read this, she will have gone to keep my mom company and to join her card friends already on display in Mom's room :) Mom, who is 89, never wants to put her cards away. To see other gorgeous samples using this image from my talented teamies, please pop over to The East Wind Facebook group. Lots of inspiration there!

Life is good; so is art.
Bonnie


Friday, May 08, 2015

Deborah ~ An RSD Altered Art Doll


Hi everyone. Last summer, I took Mary Jane Chadbourne's Imaginarium class where we altered wooden dolls using collage image heads and ever since, I have been wanting to create one with one of Rick's fabulous faces. The head and body are 3/4" wood. The legs and neck are dowels, and the base is about 1x4x2".


I chose to use the gorgeous Deborah, one of Rick's beautiful hat ladies, for the head of this doll. I coloured Deborah with Prismacolor and Polychromos pencils, and fussy cut her leaving off her fur wrap and one layer of her hat in order to fit the pre-cut head. The edges of the image were inked with black Big Brush pen and Deborah's face was adhered to the wood. Flat pearls were added to the detail on her hat.


Designer paper was adhered to her body, trimmed with an exacto to fit and edged with Vintage Photo Distress ink to create a vintage feel. A second piece of designer paper was punched along the bottom edge, embossed with a paisley folder, and adhered over the green layer to make her dress more interesting and elegant. Again, Vintage Photo was applied to bring out the detail of the embossing and to age the paper. Her arms, pre-cut and purchased from Retro Cafe, were covered with scraps from the scallop punched green paper, and adhered as sleeves. Her hands and neck dowel were painted with Fleshtone acrylic. Cuff detail was added with Inktense pencil activated with water and green half pearls became buttons. The arms were adhered after the blingy clock was added so that her hands could be placed properly to hold it. A crocheted doily was added as Deborah's collar by fitting it over the neck dowel before the head was glued onto it. Half pearls were added to the collar as buttons.


The pearl detail was repeated again when two rows were used to decorate the bottom of her dress once the crocheted lace was adhered to the hem. Her legs which were painted Titan Buff like the sides and back of the wood pieces were given Sage dots because Deborah is a stylin' gal. No plain legs for her! The base was painted with black gesso, and a strip of fancy textured border was glued around it. The sentiment was computer generated, matted in black cardstock, and adhered to the base over the border. A row of pearls was added to each side of the sentiment and around the sides. This helps to create flow throughout the altered doll as the pearls repeat from top to bottom. Oh my word, I just love her!

Thanks for joining Deborah and me today. We are both delighted that you stopped by. I have about a zillion ideas for more of these altered dolls featuring Rick's beauties. Hope you got a little inspiration, too.

Life is good; so is art.
Bonnie

Monday, May 04, 2015

One Sweet Challenge ~ Things With Wings


Hi everyone. Since it's the first of May. it's time for a new month-long theme at One Sweet Challenge. For the month of May, we would like to see you play along with "Things With Wings". There are so many images that fit that idea at Sweet Pea Stamps.


Today I chose to play along using Dreamy Lashes by Maigan Lynn. I love all of that hair and those gorgeous butterfly lashes. I coloured this beauty with Prismacolor and Polychromos pencils. She was then fussy cut and matted with black cardstock.


The background began as a rectangle of mixed media paper which I spritzed with Yellow Rose of Texas and Hottie Patottie Hot Pink Lindy's Starburst sprays. Extra drops of the pink were dripped onto the page and then blown into tiny runs with the TH Spritzer tool. Stamping was done with Hero Arts Painted Circle and Pale Ochre Archival ink and also with a grid stamp and Magenta Hue Archival ink. Splatter dots were added with black ink tapped off the eye dropper.


A border was doodled and coloured in with both black and white pens. Pink Neocolor II crayon spread with water was used to add colour next to the border. Black harlequin border was cut with a die and then divided into three segments. White paint pen dots were added to the bottom left of each diamond. Once Dreamy Lashes was adhered to the background, cheesecloth was placed at the top of her head and punched/doodled butterflies with bead bodies were scattered randomly flying out of her head. These were punched from mop up paper which I use to clean up overspray. I always keep them on my desk and often add them to my pages as punched of torn elements.


The sentiment was computer generated and printed on white cardstock. It was cut with a die, matted in black, and faux stitched. The background was double matted with black and pink textured cardstock.

Thanks for stopping by today. My dreamy lashed friend and I appreciate that. When you get a chance, pop over to the One Sweet Challenge blog to see the gorgeous projects by the rest of our talented DT. We would love to have you join us this month for our Things With Wings challenge. Can't wait to see what you create!

Life is good; so is art.
Bonnie

Friday, May 01, 2015

Mame ~ Rick St. Dennis progressive Challenge


Hi everyone. Today marks the beginning of Part 1 of the Progressive Challenge on Rick St. Dennis' Sparkle and Glitter blog. That means we can use any RSD image and the theme is Anything Goes. Anyone who plays along this month will receive the image for next month's Part 2 free. Great deal!


This time I chose to create a mixed media piece starring the fabulous Mame, one of the Broadway Chorus Girl Series found at Rick's Zibbet shop. I coloured Mame with Prismacolor and Polychromos pencils, adding Grape Crush and Lagoon Stickles as well as pink gel pen to her jewels to bling them out. Mame was then fussy cut leaving a narrow white border and mattted in black. Foam dots were added to the back of her for dimension.


The background began as a piece of mixed media paper which I spritzed with Tibetan Poppy Teal and Witch's Potion Purple Lindy's Starburst sprays, making sure to leave white space...always a challenge for me. Extra drops of the Tibetan Poppy were added and then I used the TH spritzer tool to blow out those tiny runs. It's so much easier than using a straw! The background was cut into two pieces and black Big Brush pen was added to the edges. Stamping was done with Hero Art's Painted Circle stamp using jet Black Archival ink on the section of background that won the audition.


Because the background was busy and sparkly from the mica sprays, simple matting in black and textured purple cardstock was added to ground the piece and give the eye somewhere to rest. The sentiment was computer generated onto white cardstock, matted with purple, and popped up on foam to overlap the background. Purple gems were added to the dots on the sentiment and then a trail of the same gems was adhered to either side. A purple metallic star was added above the sentiment. To complete the spread, a black punched photo corner was added to the lower left corner to help balance Mame who was adhered further to the right.


Since I couldn't capture the sparkliness of the Stickles, the sprays, the gems and stars, I just had to take this phtot from a funny angle so you could see it.

Thanks so much for joining Mame and me today. We are delighted to have your fine company. To see the rest of the amazing creations by the rest of Team A from the EDT, please be sure to visit the Sparkle and Glitter blog. We can't wait to see what you do this month. Hope you will join us!

Life is good; so is art.
Bonnie